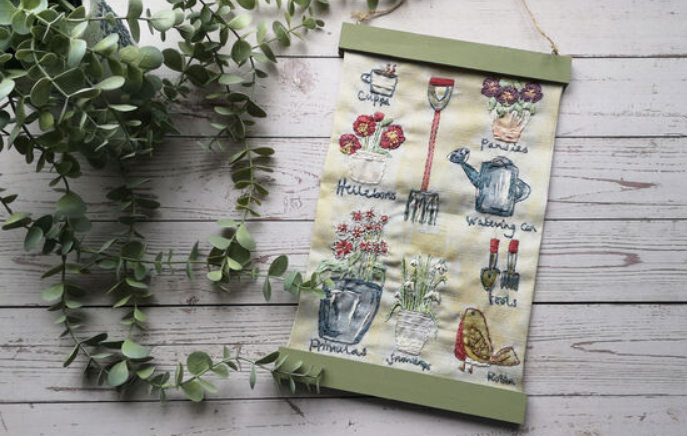
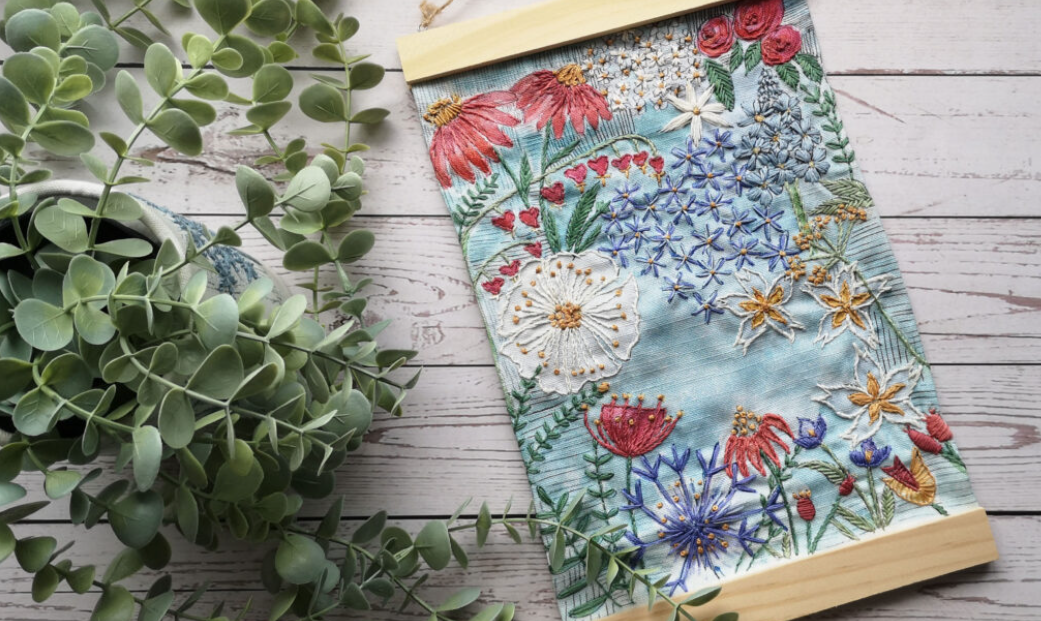
It's been a while since I’ve had time to write a blog post, but I thought I’d get a quick one in after the huge interest in our hanging panels!
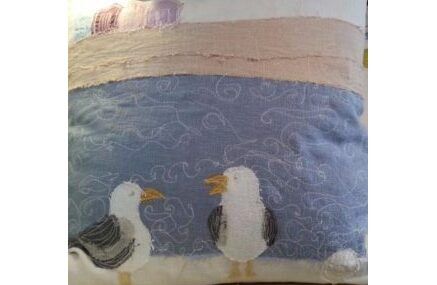
The panels can be embellished with hand or machine embroidery, or even left plain as they are! They can be framed in a traditional frame as a poster, or even transformed into something else entirely. We recently sold a cushion panel design to a lovely customer who is going to make this into a fire screen and we simply can't wait to see this finished!
So, let’s say that you intend to stitch up your panel with hand embroidery embellishments. You can see our images for inspiration and guidance, but there aren’t any specific instructions for these as they are for your enjoyment to personalise and embellish as you choose.
Prepare Your Fabric
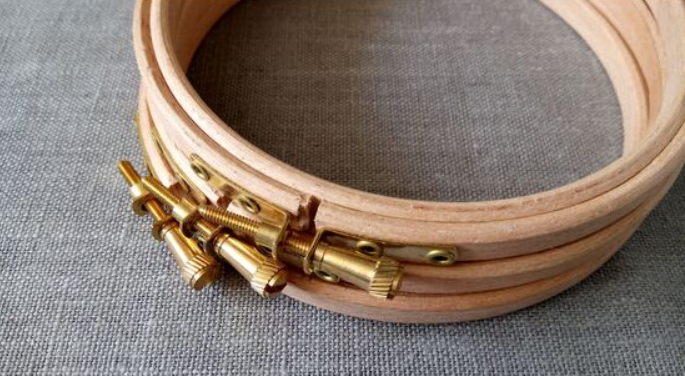
Firstly, pop your fabric embroidery panel in a hoop to regulate the tension of your stitches. I find that if I stitch a piece without a hoop, the area I’m stitching can become a little puckered due to the tension of that area being different to the rest. So, it's a personal choice, but I prefer to stitch in a hoop. We have hoops in the haberdashery, available in 5, 6 and 7 inches.
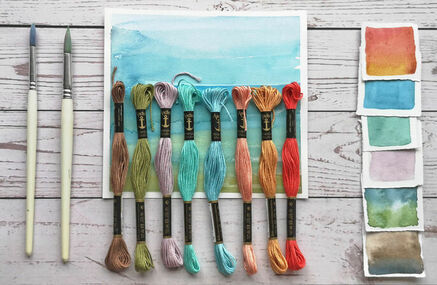
Choosing Threads and Colours
You can choose any threads and colourways you like to stitch up your panel. We’ll publish another blog post soon about thread choices and how they make your stitches look different. My thread of choice is the stranded cotton by Anchor threads. These are great quality, are colour fast, lovely to work with and do not tangle too much or shred like a lot of the cheaper unbranded threads. Always try to get the best quality threads you can afford. We do sell thread packs in carefully curated collections which you might like, you can find them here.
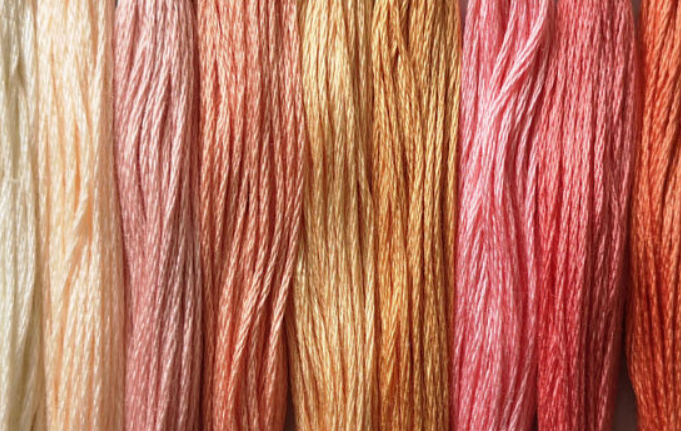
I also suggest that you pick your thread colours before you start so that you have a sure idea of what you are using. When I have picked colours and threads along the way, the project can start to look a little mismatched if it's not pulled together by something. When you select your colours at the start of a project, ensure that the colours and tones all work together. This is only a suggestion and is my preferred way of working now. You may take a more freestyle approach and indeed use up threads you already have. This is entirely your choice!
Embellishing Your Panel
If you are choosing to embellish your panel with freehand machine embroidery, go ahead and set up your fabric in your hoop properly and stitch away until your heart's content! Check out our blog on freehand machine embroidery if you’re unsure where to start! P.S. We have some really exciting machine embroidery news coming soon, so keep an eye out!
If you’re choosing to embellish your linen embroidery pattern with hand embroidery, then go ahead and choose your colours and stitches as you like. Remember, it's really important to choose colours and stitches that please you as this is a time consuming and mindful hobby which you should fully enjoy. There’s no point working on a project if you don’t really like the way it's turning out!

You can also personalise your panel by stitching a name, an important date or even an inspirational word or quote. I suggest writing in a Frixion pen which can later be removed by steam iron if it is still visible through your stitching.
Finishing
Once I feel like all my stitching is complete on a piece, I like to lightly steam press the panel. You can do this by placing your embroidery face down on a towel and then lay a thin tea towel or suchlike on top of your embroidery, and lightly press with the steam iron. This should also remove any Frixion pen marks. At this point, you can also press the sides of your panel towards the back if you haven’t already dealt with the raw edges. If you don't want to iron your work you can simply finger press the sides. You can then choose to leave these loose or slip stitch them down (ensuring you can’t see any stitches on the front). Alternatively, you can use hemming tape, which we sell here!
This is simply like a double sided tape for fabric which is activated by heat. It will fuse the fabric together when ironed in between. Please try a sample of this on a piece of scrap fabric if you haven't used this before, as you don't want this going wrong at the last stage of your beautiful embroidered wall hanging! Don't worry about folding over the top and bottom of the linen as you’ll be asking the magnets to work through too many layers. Leave the top and bottom edges alone as you won’t see them trapped in the magnetic bars anyway!
You can leave the wood bare in its plain, natural state light wood, or you can choose to paint yours a colour that complements your colour scheme or interiors. We used sample pots of emulsion and furniture chalk paint and they look fantastic!
Finally, you are ready to put the magnetic hanging frame on your fabric and hang it up! The linen should fit with the sides folded behind to exactly the same width as the hanging frames, which for those of you who need to be precise is 21cm, but I did mine by eye!
I hope this helps you enjoy the process of making your little wall hanging. They would certainly make a gorgeous gift for a loved one, or indeed for displaying in your own home!